

If your support team runs on Zendesk but sales and success live in Salesforce, you already know the friction. Contact records live in two places. Ticket history stays stuck in one tab. It's messy. A Zendesk to Salesforce migration fixes that by putting every customer interaction in one system. This guide walks you through planning it, running it, and going live without losing data.
TL;DR
- Moving Zendesk data into Salesforce means mapping tickets, contacts, and knowledge base content to new Service Cloud objects.
- Most teams lose thread formatting and automation logic if they skip a field-mapping audit first.
- A phased rollout (audit, map, test, migrate, validate, train) keeps support running during the switch.
- Timelines run from two weeks for a small help desk to several months for enterprise Zendesk instances.
Salesforce ranked #1 in customer service software for the 13th year running, according to IDC's Worldwide Semiannual Software Tracker. That's real scale. It's why so many support teams end up migrating into it.
Why Companies Switch from Zendesk to Salesforce
Zendesk is built specifically for customer support. Salesforce is built to manage the whole customer relationship, with sales, service, and marketing in one shared record. The two platforms are designed for different jobs, so the Zendesk vs Salesforce Service Cloud decision usually comes down to two factors. The first is how much automation depth you need, and the second is whether your sales and support teams already share a customer base. Team size matters as well, since a ten-person support team rarely needs the breadth of what Salesforce offers a 200-person one.
A Zendesk to Salesforce Service Cloud migration typically starts once support tickets need to sit next to deal history. The tickets no longer stay buried in a separate tool that the sales team never opens. Reps stop asking whether the customer has already reported an issue, because they can see the full account timeline instead.
| Factor | Zendesk | Salesforce Service Cloud |
| Core focus | Ticketing and support workflows | Full customer relationship (sales, service, marketing) |
| Setup speed | Fast, support-team friendly | Slower, needs admin or partner support |
| Automation depth | Strong for support macros and triggers | Deeper, cross-department workflow automation |
| Data model | Tickets, users, organizations | Cases, contacts, accounts, opportunities |
| Best fit | Standalone support teams | Companies unifying sales and service data |
| Pricing model | Per-agent, support-focused tiers | Per-user, part of broader Salesforce license |
Neither tool is wrong. The fit depends on whether support needs to stay its own island or connect to everything else your company tracks about a customer.
The trigger is usually practical rather than strategic. Sales already runs on Salesforce, and support keeps growing as the customer base expands. Leadership wants a single dashboard instead of two separate logins and a weekly export just to see the full customer picture.
What Zendesk Data Can You Move to Salesforce?
Almost everything in Zendesk has a home in Salesforce. Most of it, anyway. The mapping isn't always one-to-one, though. That's where most projects lose accuracy: fields that look similar on the surface often behave differently once they land in a Salesforce object.
Most of the actual work in a Zendesk to Salesforce data migration happens during field mapping. Get the mapping wrong, and the transfer still runs fine. The data just slowly stops making sense.
| Zendesk Object | Salesforce Object | Notes |
| Tickets | Cases | Status, priority, and tags need custom field mapping |
| Contacts | Contacts / Accounts | Organizations map to Accounts; users map to Contacts |
| Knowledge base articles | Salesforce Knowledge | Categories and article types need matching |
| Custom fields | Custom fields on Case/Contact | Field types must match, or data gets dropped or truncated |
| Attachments | Files or Attachments related list | Large attachment volumes can slow the transfer |
| Macros and triggers | Flows and automation rules | Rebuilt, not copied; logic doesn't transfer automatically |
Attachments and macros are the two categories teams most often underestimate. Both take longer than expected. A ticket macro that took five minutes to write in Zendesk can take an afternoon to rebuild correctly as a Salesforce flow.
Step-by-Step Zendesk to Salesforce Migration Process
This works best as a sequence. Skipping steps to save time is exactly how teams end up rebuilding automation twice.
Step 1: Audit Zendesk Environment
Pull a full inventory of your Zendesk setup before you touch anything in Salesforce. List every custom field, macro, trigger, tag, and integration that is currently live, and skip nothing.
Note which fields are actually used and which were set up once and then forgotten. Migrating unused fields wastes mapping time that you will want later for the fields that matter.
Step 2: Map Data Fields to Salesforce Objects
Build a field-by-field map from Zendesk to the matching Salesforce object. Decide early where each custom field will live, whether on the Case, the Contact, or a custom object.
This step decides whether your reports still work after go-live, so it deserves your full attention. Rushing the mapping is the single biggest cause of post-migration cleanup, so it pays to slow down here.
Step 3: Choose Migration Method (CSV / HDM Tool / API / SUP Managed)
Smaller migrations often work fine as a CSV export and import. Larger ones need more structure. Some teams pick a Zendesk migration tool built for this exact move. Others rely on the Salesforce API or a managed migration partner.
The right choice depends on ticket volume, custom field complexity, and whether attachments need to carry over intact. Volume drives the decision most.
Step 4: Test Migration
Run the migration against a sandbox with a sample data set first. Check that cases, contacts, and attachments land where they should, and confirm that no field values were truncated or reformatted along the way.
This is the step most likely to get skipped when a deadline is close. It deserves protection, because it is the one that prevents the worst surprises.
Step 5: Full Migration
Once the sandbox test checks out, run the full data transfer and schedule it for a low-traffic window. Some records may be briefly inaccessible during the move, so plan around that.
Communicate the freeze window to the whole support team well in advance, with no exceptions. A ticket created mid-migration is a ticket that can easily get lost.
Step 6: Validate and QA
Spot-check a sample of migrated records against the original Zendesk data. Confirm ticket counts match. Check that thread history rendered correctly, and custom fields carried the right values.
Don't rely on record counts alone. A case that migrated with the wrong status is just as broken as one that never arrived.
Step 7: Train and Go Live
Walk the support team through the new case layout, updated macros, and any changed workflows before cutting Zendesk access. A short recorded walkthrough saves dozens of one-off questions in week one.
Keep Zendesk in read-only mode for a few weeks after go-live so that reps have a safety net to fall back on. Being able to check the old records helps them get comfortable working in Salesforce without worrying that something has been lost.
Common Challenges When You Migrate Zendesk to Salesforce
Even a well-planned migration runs into friction. Most of it traces back to the same handful of issues. Catch them during testing, and go-live stays boring, which is exactly what you want.
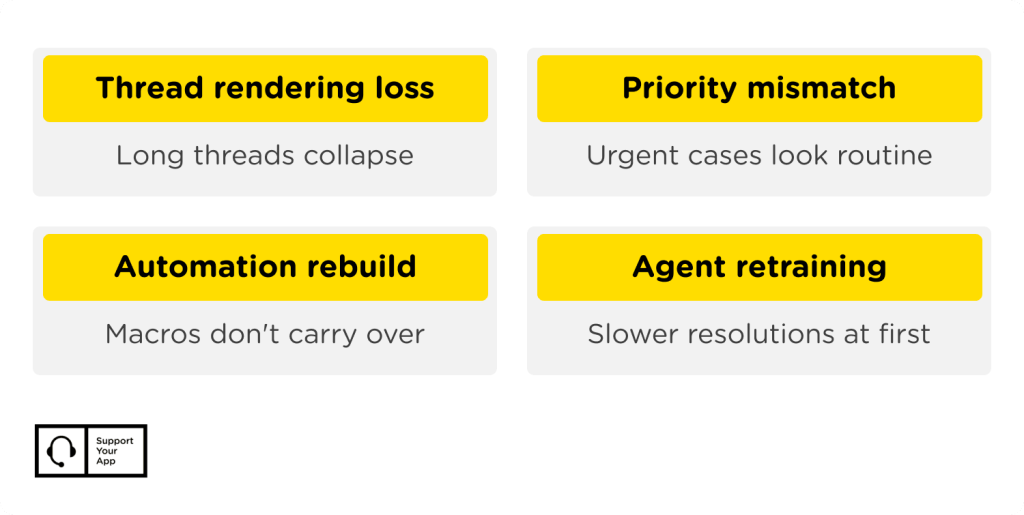
Thread rendering loss. Long ticket conversations with multiple replies sometimes lose formatting or collapse into a single block of text. Test this specifically during Step 4 before go-live.
Priority mismatch. Zendesk priority levels don't map cleanly to Salesforce case priority fields. Decide on a translation table before migrating. Not case by case afterward.
Automation rebuild. A Zendesk data migration rarely loses data outright. It loses context and formatting instead. Automation is where that shows up first, since macros and triggers don't carry over as-is.
Agent retraining. Reps who've worked in Zendesk for years need real training time in Salesforce, not a five-minute walkthrough. Give it real time. Rushed training shows up as slower resolution times for the first month.
Weighing a move between help desks instead of into a full CRM? Our Freshdesk to Zendesk migration guide covers that narrower switch.
How Long Does Migration Take?
Timeline depends almost entirely on ticket volume, custom field count, and how much automation needs rebuilding. Smaller Zendesk instances move fast. Enterprise ones don't. It's mostly about complexity, not headcount.
| Company Size | Typical Timeline | Main Factors |
| Small (under 5,000 tickets) | 2-4 weeks | Simple field mapping, minimal automation |
| Mid-size (5,000-50,000 tickets) | 6-10 weeks | Moderate custom fields, macro rebuilding |
| Enterprise (50,000+ tickets) | 3-6 months | Complex integrations, heavy automation, multiple departments |
Add extra time if the project also involves consolidating multiple Zendesk instances, or if attachments make up a large share of ticket volume. Skipping the sandbox test rarely pays off. Teams that skip it in Step 4 often save a week upfront and lose two fixing mismatched records after launch.
How SupportYourApp Handles the Migration
SupportYourApp runs this kind of project as part of help desk migration services. A dedicated project lead pairs with support agents who keep tickets moving during the switch. Nothing stalls. The team audits your Zendesk setup, builds the field map, and tests the transfer in a sandbox before anything goes live.
SupportYourApp already runs support operations for SaaS, fintech, and eCommerce clients. The migration team knows what a broken macro or a mismatched priority field costs in daily ticket handling. We work alongside your Salesforce admin or one of our tech partners when a project needs deeper platform-side configuration.
Ticket volume sometimes spikes during the cutover window, and help desk outsourcing coverage can absorb that extra load so first-response times don't slip. Customers never notice the difference. The switch requires a lot of work behind the scenes, but it stays invisible on their end.
Pricing depends on ticket volume, field complexity, and how much of the current Zendesk setup needs rebuilding rather than mapping. A short discovery call is usually enough to scope timeline and cost before anything gets committed.